Images Background and Color
Images on the Web
Images fall into one of 2 general classes: Inline images and
External images. Inline images appear on a Web page along with
text and links, and are automatically loaded when the page itself is
retrieved. Inline images must be in either gif or jpeg format.
These extensions, like file names, are case sensitive, so use lowercase if
at all possible. External images are stored separate from the Web
page and are loaded only on demand, or may be downloaded for viewing in a
graphical viewer.
The <IMG> Tag
The <IMG> tag like the <>HR> tag has no closing tag. It does
however have many attributes. Here is a table of some of it's attributes:
-
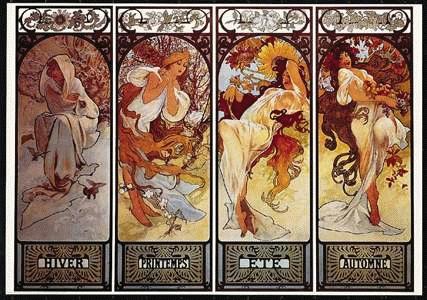
SCR This will be the path and filename
(in quotes) of the image that you want to display. To display an image that
is located in the current directory you would enter some code like this:
<IMG SCR="season.jpg">. This will give you the following result:
For an image one directory up you would use <IMG SCR="../season.jpg">
and so on just like in link
pathnames.
-
ALIGN Text and Image Alignment
-
ALIGN=TOP Aligns the top of the image with the
topmost part of the line, this may be the top of the text or the top of
another image. Example:
This image is aligned "TOP"

ALIGN=TEXTTOP Aligns the top of the image
with the top of the tallest text in the line (wheras ALIGN=TOP aligns the
image with the topmost item in the line). Example:
This image is Aligned using TEXTTOP
ALIGN=MIDDLE Aligns the center of the image
with the middle of the line (usually the baseline of the line of text, not
the actual middle of the line). Example:
This image is aligned using
MIDDLE
ALIGN=ABSMIDDLE Aligns the middle of the
image with the middle of the largest item in the line.(ALIGN=MIDDLE usually
aligns the middle of the image with the baseline of the text, not its
actual middle.) Example:
This image is aligned using ABSMIDDLE
ALIGN=BOTTOM Aligns the bottom of the image
with the bottom of the line. Example:
This image is Aligned using BOTTOM
ALIGN=BASELINE Aligns the bottom of the
image with the baseline of the text. ALIGN=BASELINE is the same as
ALIGN=BOTTOM, but ALIGN=BASELINE is a more descriptive name. Example:
This image is Aligned using BASELINE
ALIGN=ABSBOTTOM Aligns the bottom of
the image with the lowest item in the line (which may be below the baseline
of the text). Example:
This image is Aligned using ABSBOTTOM
-
ALIGN=LEFT and RIGHT = LEFT and RIGHT, and Text Wrapping
 ALIGN=LEFT aligns
an image to the left margin and causes the remaining text to to be
displayed using the image as the LEFT margin.
ALIGN=LEFT aligns
an image to the left margin and causes the remaining text to to be
displayed using the image as the LEFT margin.
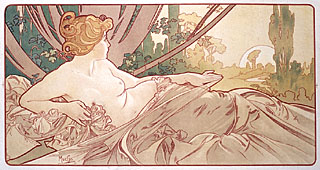
Above: <IMG SRC="dawn.jpg" HEIGHT=170 WIDTH=320 ALIGN=LEFT>
Below: <IMG SRC="dawn.jpg" HEIGHT=170 WIDTH=320 ALIGN=RIGHT >
ALIGN=RIGHT aligns
an image to the right margin and causes the remaining text to to be
displayed using the image as the right margin.
<BR CLEAR=??> Stopping Text Wrapping,
has 3 attributes, LEFT, RIGHT, and ALL. These are used to stop the above
text wrapping features. If you use the <BR> without the CLEAR attribute,
writting will continue on the following line next to the image.
Adjusting the Space Around
Images
ALIGN=LEFT
aligns an image to the left margin and causes the remaining text to to be
displayed using the image as the LEFT margin. The HSPACE attribute of 30
keeps the text 30 pixels away from the image. HSPACE also moves the image
30 pixels in from the left margin.
VSPACE does the same in the Vertical direction that HSPACE
does in the Horizontal direction. Example:
Here I have used no <P> tags, instead I have used VSPACE=30 to pad the
image vertically.
BORDER, You can adjust the width of the
Border around a linked image like this: BORDER=5. Be careful about
setting this to zero, people may not realize that it is a link.
A Border may also be used to frame a picture. Here is an example setting
the border width to 7:
<IMG SRC="tbook.gif" HEIGHT=35 WIDTH=35 BORDER=7>

ALT Tag, an alternative to images. Use this
attribute to supply browser that do not support graphics some text to
display in place of the image. Example:
<IMG SRC="dawn.jpg" ALT="A nice picture">
Image Dimensions and Scaling
Images and Links
To make an image into a link, you put the SRC="FileName" before the
closing anchor tag like this:
<A HREF="DestinationFile"><IMG SRC="GraphicFile.gif">Optional
Text</A>
Here is an example of how the above code would work:
To Index
LOWSRC Image Previews
Using the LOWSRC attribute will load a low-res image first. After
all of the text is loaded and all of the LOWSRC images are loaded, then the
browser will go back and load the larger SRC images. LOWSRC is used like
this:
<IMG SRC="dawn.jpg" HEIGHT=170 WIDTH=320 LOWSRC="ldawn.jpg">
Using Colors
Naming Colors
There are two ways of naming colors in HTML, using a hexadecimal number
or using one of the predefined color names.
The predefined color names are normally: Black, White, Green, Maroon,
Olive, Navy, Purple, Gray, Red, Yellow, Blue, Teal, Lime, Aqua, Fuchsia,
and Silver. They come from the Windows palette, which only allows 16 colors.
If you want to specify the color yourself, you need to state 3 hexadecimal
numbers between 0 and FF (255). The first number is the amount of Red, the
second is the amount of Green, and the third is the amount of Blue. You must
precede the numbers with the pound sign (#) and inclose the color in quotes.
Here is the code for the background color of this page: BGCOLOR="#E0E0FF".
In general the lower the numbers the darker the color.
Changing the BackGround Color BGCOLOR
To change the background color, decide what color you want, then add the BGCOLOR
attribute to the <BODY> tag. If you choose to use a Hex number, precede it with
the pound # sign and enclose it in quotes (this may be optional on newer browsers). If you
choose to use one of the predefined colors you do not need the # or quotes. Here are two
examples:
<BODY BGCOLOR=GREEN> <BODY BGCOLOR="#934CE8">
Changing Text Colors
When changing the back ground color, it makes also sense to change the color of the text
itself. To globally change the colors of the text on your page you use the following
attributes in the BODY tag. Pick a color as you did for the BGCOLOR attribute and
asign it to one of the following attributes:
- TEXT Controls the color of all the page's body text that isn't a link, including
headings, body text, text inside tables, and so on.
- LINK Controls the color of normal, unfollowed links in the page.
- VLINKControls the color of visited links.
- ALINKControls the color of a link that has had the mouse button pressed on it
but not released yet.
Changing FONT Color
You can change the color of individual characters within your page with the FONT
Tag's COLOR attribute. Just include
the color attribute
within the
FONT brackets with the color that
you wish to
use . When you are done with the
color use the </FONT> tag. An example would be: <FONT COLOR=RED>.
Image Backgrounds
You may use a tiled background for your page by using the BACKGROUND attribute with
the BODY tag. Unfortunately Netscape does not have the WATERMARK attribute yet. Only the
spawn of satin, microsoft, has that at this time. The watermark uses one image that stays
put while the rest of the page scrolls over it. This is how it should be. Anyway, to tile
a background you would include some code like this:
<BODY BACKGROUND="../backgrounds/marble.gif">